Do It Yourself Epoxy Countertops
Epoxy countertops have become increasingly popular in recent years due to their durability, affordability, and ease of installation. If you're looking to update your kitchen or bathroom without breaking the bank, DIY epoxy countertops are a great option. With a little bit of planning and effort, you can create beautiful and long-lasting countertops that will add value to your home.
Materials You'll Need
Before you get started, you'll need to gather the following materials:
- Epoxy resin and hardener
- Pigments (optional)
- Mixing containers and stir sticks
- Sandpaper (various grits)
- Buffing compound and polishing pads
- Squeegee or spreader
- Heat gun or torch
- Safety glasses, gloves, and respirator
Preparing the Surface
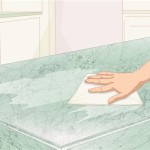
The first step is to prepare the surface of your countertops. This involves cleaning them thoroughly with a degreaser and sanding them to create a smooth surface for the epoxy to adhere to. If you're working with an existing countertop, you may need to remove the old finish before sanding.
Mixing the Epoxy
Once the surface is prepared, it's time to mix the epoxy. Follow the manufacturer's instructions carefully, as the mixing ratio will vary depending on the brand of epoxy you're using. Once the epoxy is mixed, you'll have a limited amount of time to work with it before it starts to set.
Applying the Epoxy
Apply the epoxy to the prepared surface using a squeegee or spreader. Work in small sections, starting at one end of the countertop and working your way to the other. As you apply the epoxy, use a heat gun or torch to remove any air bubbles that may form.
Curing the Epoxy
Once the epoxy is applied, allow it to cure for the amount of time specified by the manufacturer. This can take anywhere from 24 to 48 hours, depending on the type of epoxy you're using. During this time, it's important to keep the area well-ventilated and to avoid touching or moving the countertops.
Sanding and Polishing
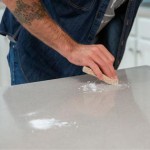
Once the epoxy is cured, you can sand and polish it to create the desired finish. Start with a coarse grit sandpaper and gradually work your way up to a fine grit. Use a buffing compound and polishing pads to bring the countertops to a high shine.
Finishing Touches
Once the countertops are sanded and polished, you can add any finishing touches you desire. This could include adding a sealant to protect the epoxy or applying a decorative glaze to add color or texture.
Tips for Success
Here are a few tips to help you achieve successful results with your DIY epoxy countertops:
- Use a high-quality epoxy resin and hardener.
- Prepare the surface properly before applying the epoxy.
- Follow the manufacturer's instructions carefully when mixing and applying the epoxy.
- Use a heat gun or torch to remove any air bubbles that may form.
- Allow the epoxy to cure for the full amount of time specified by the manufacturer.
- Sand and polish the epoxy carefully to create the desired finish.
Conclusion
With a little bit of planning and effort, you can create beautiful and long-lasting epoxy countertops that will add value to your home. By following the steps outlined in this article, you can achieve professional-looking results without the high cost.
Led Lights Installed In Epoxy Countertop Start To Finish Stone Coat Youtube

How To Epoxy Kitchen Countertop White Marble

Diy Kitchen Countertop Makeover Youtube

Diy Resin Countertops Using Clear Epoxy Coating And Pigments 11 Steps With Pictures Instructables

How To Make White Kitchen Countertops With Epoxy Youtube

Easy Diy Epoxy Countertops Love Renovations

Use Epoxy To Coat Existing Countertops Make Them Look Like Real Stone Step By Explained

Pour Earth Tone Granite Out Of A Bucket

How To Install Epoxy Over Old Countertops Ultimate Guide Stone Coat Youtube

Diy Black Blue Kitchen Countertops With Ghost Epoxy
See Also


