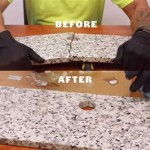
How To Replace Undermount Sink Without Removing Countertop
Replacing an undermount sink without removing the countertop can be a daunting task. However, with the right tools and techniques, it is possible to do it yourself. Here is a step-by-step guide on how to replace an undermount sink without removing the countertop.
Step 1: Gather Your Tools and Materials
Before you begin, gather all the necessary tools and materials. You will need the following:
- New undermount sink
- Sink clips
- Screw clamps
- Caulk gun
- Silicone caulk
- Utility knife
- Wet/dry vacuum cleaner
- Putty knife
- Rags
Step 2: Remove the Old Sink
Start by disconnecting the water supply lines and drain. Then, use a utility knife to cut the caulk around the sink. Next, use a wet/dry vacuum cleaner to remove any remaining debris. Finally, use a putty knife to pry the sink loose from the countertop.
Step 3: Clean the Countertop
Once the old sink is removed, clean the countertop thoroughly. Use a damp cloth to wipe away any dirt or debris. Then, allow the countertop to dry completely.
Step 4: Apply Caulk to the Countertop
Apply a bead of silicone caulk around the perimeter of the countertop where the new sink will be installed. Make sure to press the caulk into the countertop to create a good seal.
Step 5: Install the Sink Clips
Next, install the sink clips around the perimeter of the sink. These clips will help to hold the sink in place. Make sure to use a screw clamp to tighten the clips securely.
Step 6: Set the Sink in Place
Carefully set the new sink into the countertop. Make sure that the sink is centered and that the edges are flush with the countertop.
Step 7: Tighten the Sink Clips
Once the sink is in place, tighten the sink clips until the sink is secure. Use a screw clamp to apply even pressure around the perimeter of the sink.
Step 8: Caulk Around the Sink
Finally, caulk around the edges of the sink to create a watertight seal. Use a wet finger to smooth out the caulk and remove any excess.
Step 9: Reconnect the Water Supply Lines and Drain
Reconnected the water supply lines and drain to the new sink. Make sure to tighten the connections securely.
Step 10: Allow the Caulk to Cure
Allow the caulk to cure for 24 hours before using the sink. This will give the caulk time to dry and form a strong seal.
Step 11: Enjoy Your New Sink
Congratulations! You have now successfully replaced your undermount sink without removing the countertop. Enjoy your new sink for years to come.

How To Replace A Tiled In Kitchen Sink No Tile Repairs Needed

How To Take Out Sink Without Damaging The Countertop Remove A

How To Replace And Install An Undermount Kitchen Sink House By The Preserve

How To Replace A Tiled In Kitchen Sink Without Damaging Tile

Upgrade Your Kitchen Sink Diy Replacement

Can You Replace A Kitchen Sink Without Replacing The Countertop Cabinets Tiles Nj Art Of Tile

How To Replace A Kitchen Sink The Home

Sink Replacements What You Need To Know Surface Link

How I Fit An Undermount Sink For Easy Maintenance

Replacing 60 40 Undermount Sink
See Also


