How To Attach a Countertop To a Cabinet
Attaching a countertop to a cabinet base is a crucial step in kitchen and bathroom installations, ensuring both structural integrity and aesthetic appeal. A properly secured countertop provides a stable work surface, prevents movement, and helps protect the underlying cabinets from moisture damage. A secure attachment also significantly contributes to the overall longevity and usability of the cabinetry. This article details the essential steps and best practices to achieve a robust and professional countertop installation.
Prior to initiating the attachment process, it is imperative to gather all necessary materials and tools. This proactive approach minimizes delays and ensures a smooth workflow. The required items generally include a drill or impact driver, appropriate drill bits, screws (typically wood screws, but the specific type may vary depending on the countertop and cabinet materials), construction adhesive, shims, a measuring tape, a level, and safety glasses. The length and type of screws are particularly important; they should be long enough to securely penetrate the cabinet frame but not so long that they protrude through the countertop material.
Surface preparation is another critical preliminary step. The upper surfaces of the cabinets must be clean, level, and free of any debris that could interfere with the countertop's contact and adhesion. Any existing irregularities or imperfections on the cabinet tops should be addressed using shims to create a perfectly level plane. This ensures that the countertop sits evenly across all support points, preventing stress and potential cracking or warping. Using a level is crucial to verify that the shims are correctly positioned and provide adequate support.
The selection of appropriate fasteners is paramount for a lasting installation. Wood screws are the most common choice for attaching countertops to wooden cabinet frames. However, the specific screw length and gauge should be carefully considered based on the thickness of both the countertop and the cabinet frame members. Always pre-drill pilot holes before driving screws, particularly when working with dense materials like hardwood or engineered stone. Pre-drilling prevents the wood from splitting and ensures that the screws engage properly. For countertops made of heavier materials like granite or quartz, specialized fasteners or mechanical anchors may be necessary, and consulting the countertop manufacturer's recommendations is highly advisable.
The use of construction adhesive, in addition to screws, significantly enhances the bond between the countertop and the cabinet. A high-quality construction adhesive provides a flexible and resilient connection that helps distribute stress and absorb vibrations. Apply a continuous bead of adhesive along the top edges of the cabinet frames where the countertop will rest. Ensure that the adhesive coverage is uniform and covers the entire contact area. Avoid applying excessive amounts of adhesive, as this can create a messy installation and potentially interfere with the countertop's levelness. Silicone-based adhesives are often preferred due to their excellent adhesion properties and resistance to moisture.
Once the preparatory work is complete, carefully position the countertop onto the prepared cabinet base. Precise alignment is critical to ensuring a professional-looking result. Double-check that the countertop overhangs are consistent on all sides and that the countertop is properly centered. Minor adjustments can be made at this stage, but avoid forcefully shifting the countertop, as this could damage the adhesive bond or misalign previously leveled shims. Use clamps or weights to temporarily secure the countertop in place while the adhesive cures. This prevents movement during the curing process and ensures a strong, permanent bond.
After the adhesive has been applied and the countertop is accurately positioned, proceed with securing it using screws. Drive screws through the cabinet frame and into the underside of the countertop. Space the screws evenly along the cabinet frame, typically every 12 to 18 inches. The precise spacing may vary depending on the size and weight of the countertop. Ensure that the screws are driven straight and flush with the cabinet frame, avoiding over-tightening, which can strip the screw holes or crack the cabinet frame. Using a drill with adjustable torque settings can help prevent over-tightening.
The curing time for the construction adhesive is a crucial factor in the overall success of the installation. Adhere strictly to the manufacturer's recommendations regarding curing time. The adhesive must be allowed to fully cure before placing any heavy objects on the countertop or subjecting it to significant stress. Premature use can compromise the adhesive bond and potentially lead to movement or failure of the countertop.
Key Point 1: Leveling and Shimming
Achieving a perfectly level surface before attaching the countertop is paramount. Cabinets are rarely perfectly level, and even slight variations can lead to uneven weight distribution, potential cracking, and an unprofessional appearance. Shims are thin, tapered pieces of material used to compensate for these irregularities. Before placing the countertop, use a level to identify any low spots on the cabinet frames. Insert shims under the cabinet frames as needed to bring them into alignment. The strategic placement of shims ensures uniform support and prevents stress points on the countertop. Checking the level in multiple directions is essential to guarantee a truly level surface.
Key Point 2: Appropriate Fastener Selection
The choice of fasteners significantly impacts the durability and stability of the countertop installation. Wood screws are generally suitable for attaching countertops to wooden cabinets. However, the specific length and gauge of the screws must be carefully selected based on the thickness of both the countertop and the cabinet frame members. Screws that are too short will not provide adequate grip, while screws that are too long may protrude through the countertop. Always pre-drill pilot holes before driving screws, especially when working with hardwoods or engineered stone. This prevents splitting and ensures that the screws engage properly. For heavier countertops, such as those made of granite or quartz, consider using specialized fasteners designed for these materials. Consult the countertop manufacturer's guidelines for recommendations on appropriate fastener types and installation techniques.
Key Point 3: Adhesive Application
Construction adhesive plays a vital role in creating a strong and resilient bond between the countertop and the cabinet base. It provides a continuous layer of support that helps distribute weight and absorb vibrations. Apply a uniform bead of adhesive along the top edges of the cabinet frames, ensuring complete coverage of the contact area. Avoid applying excessive amounts of adhesive, as this can create a messy installation and potentially interfere with the countertop's levelness. Silicone-based adhesives are often preferred due to their excellent adhesion properties and resistance to moisture. Allow the adhesive to fully cure according to the manufacturer's instructions before placing any heavy items on the countertop. This ensures that the adhesive bond is fully developed and can withstand the intended load.
Following the initial attachment, a thorough inspection of the installed countertop is necessary. Examine all edges and seams for any gaps or inconsistencies. If any gaps are present, apply a bead of color-matched caulk to seal them and prevent moisture intrusion. Tighten any loose screws and ensure that all shims remain securely in place. Once the inspection is complete, allow the adhesive to fully cure before using the countertop. The curing time will vary depending on the specific adhesive used, but it is typically around 24 to 48 hours.
After the adhesive has cured, the countertop is ready for use. However, it is important to avoid placing excessive weight on the countertop for the first few days. This allows the adhesive to fully strengthen and ensures a permanent bond. Regularly inspect the countertop for any signs of movement or damage. If any issues are detected, address them promptly to prevent further deterioration. With proper installation and maintenance, a countertop can provide years of reliable service and enhance the beauty of the kitchen or bathroom.
For optimal results, consider consulting with a professional installer, particularly for countertops made of heavy or delicate materials. A professional installer has the expertise and equipment to ensure a flawless installation and can provide valuable advice on maintenance and care. While DIY countertop installation is feasible, it requires careful planning, attention to detail, and adherence to best practices. Investing in professional installation can often save time, money, and frustration in the long run.

How To Install Laminate Countertops Step By

How To Install Laminate Countertops Step By

Installing Laminate Countertops Ana White

How To Install Laminate Countertops Step By

How To Install A Kitchen Countertop Buildipedia Diy

How To Install Laminate Countertops Step By

Installing Tile Countertops Backsplash Family Handyman

How To Install Laminate Countertops Step By

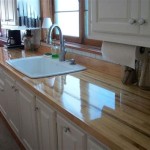
How To Cut Install Butcher Block Countertops From A Z

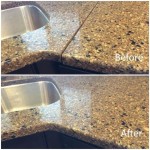
Installing Quartz Countertops Frosty Carrina House Of Hepworths
See Also