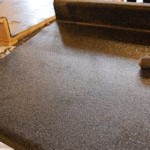
DIY Epoxy Countertops Over Laminate
Are you looking to upgrade the look of your kitchen or bathroom without breaking the bank? Covering your old laminate countertops with epoxy is a great way to achieve a high-end look at a fraction of the cost. Here's a step-by-step guide to help you create beautiful and durable epoxy countertops over laminate.
Materials You'll Need:
- Epoxy resin and hardener
- Mixing containers and stir sticks
- Spreaders
- Leveling tool
- Sandpaper (120-grit, 220-grit)
- Sanding block
- Rubbing compound
- Polishing pads (2000-grit, 3000-grit)
- Painter's tape (optional)
- Spray bottle (filled with water)
- Gloves
Step 1: Prepare the Laminate Surface
Thoroughly clean the laminate surface with a degreaser to remove any dirt, grease, or debris. Sand the surface with 120-grit sandpaper to create a scuffed texture that will help the epoxy adhere. Wipe away the dust with a damp cloth.
Step 2: Mix the Epoxy
In a well-ventilated area, wear gloves and follow the manufacturer's instructions to mix the epoxy resin and hardener. Stir thoroughly until the mixture is combined and free of lumps.
Step 3: Apply the First Coat of Epoxy
Pour a thin layer of epoxy onto the prepared laminate surface. Use a spreader to evenly distribute the epoxy and remove any excess. Use a leveling tool to remove any air bubbles or uneven areas. Allow the first coat to cure for the time specified by the manufacturer.
Step 4: Sand and Clean
Once the first coat is cured, sand it lightly with 220-grit sandpaper. Remove the dust with a damp cloth. Repeat this process after applying each subsequent coat of epoxy.
Step 5: Apply Subsequent Coats of Epoxy
Depending on the desired thickness and look, you may need to apply multiple coats of epoxy. Allow each coat to cure fully before sanding and cleaning.
Step 6: Remove Excess Epoxy
Once the final coat of epoxy has cured, use a razor blade to carefully remove any excess epoxy that has spilled over the edges or onto the walls. Be sure to wear gloves and safety glasses when doing this.
Step 7: Buff and Polish
Start by buffing the epoxy surface with a rubbing compound using a polishing pad. Gradually increase the grit of the polishing pads (2000-grit, 3000-grit) until the surface is smooth and glossy. Wipe away any residue with a damp cloth.
Tips:
- Test the epoxy mixture on a small, inconspicuous area before applying it to the entire surface.
- To create a more textured look, use a roller instead of a spreader to apply the epoxy.
- If you want to add color or patterns to the epoxy, you can mix in pigments or decorative elements before applying it.
- To prevent the epoxy from running off the edges of the laminate, use painter's tape to create a barrier.
- Keep the area well-ventilated during the entire process.

Epoxy Over Formica Countertop Tutorial

How To Install Epoxy Over Old Countertops Ultimate Guide Stone Coat Youtube

Epoxy Over Laminate Counters Aka Formica Mimzy

How To Resurface Kitchen Countertops Let S Paint Furniture

Epoxy Over Old Laminate Countertop To Create The Look Of Granite Not Sponsored

How To Make White Kitchen Countertops With Epoxy Youtube

Build Epoxy New Countertops Home Reno Ep 3

Diy Kitchen Countertop Makeover Youtube

Epoxy Surface Preparation For The 5 Most Common Countertop Surfaces Counter Top

Epoxy Countertops A Beginner S Guide
See Also


