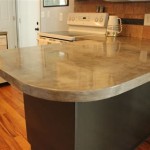
Do It Yourself Laminate Countertops
Laminate countertops are a popular choice for kitchens and bathrooms because they are durable, affordable, and easy to clean. They are also available in a wide variety of colors and patterns, so you can find one that matches your décor. If you are handy and have a few basic tools, you can install laminate countertops yourself. Here is a step-by-step guide to help you get started.
Materials and Tools
To install laminate countertops, you will need the following materials and tools:
- Laminate countertop
- Plywood subtop
- Contact cement
- Laminate trim (optional)
- Circular saw
- Jigsaw
- Router (optional)
- Clamps
- Hammer
- Nails
- Caulk gun
- Caulk
Step 1: Prepare the Subtop
The first step is to prepare the plywood subtop. The subtop should be made of 3/4-inch thick plywood. Cut the subtop to the size of your countertop, and then sand the edges smooth.
Step 2: Apply Contact Cement
Once the subtop is prepared, you can apply contact cement to the surface. Contact cement is a strong adhesive that will bond the laminate to the subtop. Apply a thin, even coat of contact cement to the subtop, and then let it dry for 15 minutes.
Step 3: Position the Laminate
Once the contact cement is dry, you can position the laminate on the subtop. Carefully align the laminate with the edge of the subtop, and then press it down firmly. Use clamps to hold the laminate in place while the contact cement dries.
Step 4: Trim the Laminate
Once the contact cement is dry, you can trim the laminate to the size of the countertop. Use a circular saw to cut the laminate to length, and then use a jigsaw to cut out any curves or notches. If you are using laminate trim, you can install it now.
Step 5: Seal the Edges
Once the laminate is trimmed, you need to seal the edges to prevent moisture from getting underneath the laminate. Apply a bead of caulk to the edges of the laminate, and then smooth it out with your finger. You can also use a caulk gun to apply the caulk.
Step 6: Install the Countertops
The final step is to install the countertops. Position the countertops on the cabinets, and then secure them with screws or nails. You may also need to use shims to level the countertops.
Tips
Here are a few tips for installing laminate countertops:
- Make sure the subtop is level before you apply the contact cement.
- Apply a thin, even coat of contact cement to the subtop.
- Carefully align the laminate with the edge of the subtop before pressing it down.
- Use clamps to hold the laminate in place while the contact cement dries.
- Trim the laminate to the size of the countertop before sealing the edges.
- Apply a bead of caulk to the edges of the laminate to prevent moisture from getting underneath the laminate.
- Position the countertops on the cabinets, and then secure them with screws or nails.
- You may also need to use shims to level the countertops.

How To Diy Laminate Countertops Dap Global

How To Diy Laminate Countertops

How To Build A Laminate Counter This Old House Youtube

Diy Laminate Countertops 8 Steps With Pictures Instructables

Building Diy Wood Countertops From Plywood Laminate For 300 Crafted Work

Diy Kitchen Countertop Makeover

Building Diy Wood Countertops From Plywood Laminate For 300 Crafted Work

How To Install Laminate Countertops Formica

How To Install Laminate Countertops Formica

Installing Laminate Countertops Family Handyman


