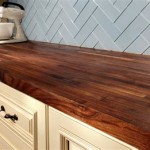
How to Caulk a Kitchen Countertop
Caulking your kitchen countertop is an essential step in maintaining a clean and sanitary workspace. It helps seal the gap between the countertop and the backsplash, preventing water, food, and debris from accumulating in the crevices, leading to mold growth and unpleasant odors. This article will guide you through the process of caulking your kitchen countertop effectively, ensuring a long-lasting and hygienic finish.
Preparing the Surface
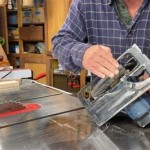
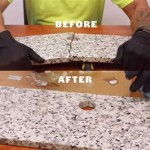
Before applying caulk, it is crucial to prepare the surface properly. This involves thoroughly cleaning the area where the caulk will be applied. Start by removing any existing caulk using a utility knife or a caulk remover tool. Be cautious not to damage the countertop or backsplash while scraping off the old caulk. Once the old caulk is removed, clean the area with a mild detergent and warm water. Make sure to rinse the area completely and allow it to dry thoroughly. This ensures a clean and dry surface for the new caulk to bond with.
After cleaning, you may need to apply a primer to the area if the surface is porous. This helps the caulk adhere properly and prevents it from peeling off over time. Consult the manufacturer's instructions for the specific primer you choose to determine the drying time and application techniques.
Applying the Caulk
Once the surface is prepared, it's time to choose the right caulk for your countertop. Silicone caulk is a popular option for kitchens due to its water-resistant properties and mold-resistant qualities. However, you may consider using polyurethane caulk for added durability and flexibility.
To apply the caulk, use a caulk gun and cut the tip of the caulk tube at a 45-degree angle, adjusting the size of the opening based on the width of the gap you need to fill. Apply the caulk in a continuous bead along the joint, ensuring it is smooth and even. Use a damp finger or a caulk tool to smooth out the caulk and create a neat finish. Remove any excess caulk immediately for a clean and professional look.
Finishing Touches
Once the caulk is applied, allow it to dry completely according to the manufacturer's instructions. This typically takes 24 hours. After it has fully dried, you can gently clean any remaining caulk residue with a damp cloth. It's also a good idea to apply a sealant over the caulk to enhance its durability and longevity.
To ensure the longevity of your caulk, avoid using abrasive cleaning products on the countertop area. Use a mild detergent and a soft cloth for cleaning and avoid scrubbing the caulk directly. By following these simple tips, you can keep your kitchen countertop looking its best for years to come.

How To Install Silicone Caulk Around Kitchen Countertop Shower Bath Tub Etc

How To Replace Grout With Caulk On A Kitchen Tile Backsplash Caulking Countertop Youtube

How To Caulk A Kitchen Counter With Easy Steps Faqs And Abbotts At Home

How To Caulk Like A Pro Tutorial Nest For Less

How To Caulk Countertop Backsplash A Complete Guide Marble Com

How To Caulk A Kitchen Counter With Easy Steps Faqs And Abbotts At Home

How To Install Caulk On A Kitchen Tile Backsplash Youtube

How To Repair Caulk On A Stone Countertop Backsplash Beginners Diy Guide

How To Caulk A Kitchen Counter With Easy Steps Faqs And Abbotts At Home

How To Install Silicone Caulk Around Kitchen Countertop Shower Bath Tub Etc Youtube
See Also