How To Install Tile Countertops
When it comes to kitchen remodeling, installing tile countertops is a fantastic option. Tile countertops are not only aesthetically pleasing, but they are also durable and easy to clean. Furthermore, tile comes in various materials, colors, and patterns, allowing you to customize your countertops to match your kitchen's décor. In this article, we will guide you through the process of installing tile countertops, ensuring a successful and professional-looking outcome.
Materials Required:
- Tiles
- Thin-set mortar
- Grout
- Notched trowel
- Grout float
- Sponge
- Bucket
- Level
- Tape measure
- Pencil or marking tool
Step 1: Prepare the Surface
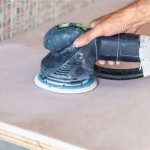
Before installing the tiles, it's crucial to prepare the surface. Start by removing any existing countertops or fixtures. Then, thoroughly clean the surface to remove any dirt, debris, or grease. Ensure the surface is level and stable by using a level. If necessary, apply a layer of backer board to create a smooth and even surface for the tiles.
Step 2: Apply Thin-set Mortar
Using a notched trowel, apply a thin layer of thin-set mortar to the prepared surface. The notched trowel will create ridges in the mortar, providing better adhesion for the tiles. Spread the mortar evenly, ensuring it covers the entire surface.
Step 3: Install the Tiles
Starting from one corner, carefully place the tiles onto the thin-set mortar. Press down firmly to ensure proper adhesion. Use a level to check if the tiles are level and adjust as needed. Continue installing the tiles, row by row, until the entire surface is covered.
Step 4: Cut Tiles for Edges and Corners
For areas around edges and corners where full tiles cannot be used, you will need to cut tiles to fit. Measure the space and mark the tiles accordingly. Use a tile cutter or wet saw to make precise cuts. Smooth the edges of the cut tiles using a tile file.
Step 5: Grout the Joints
Once the tiles are installed, you need to grout the joints between them. Mix the grout according to the manufacturer's instructions and apply it to the joints using a grout float. Press the grout firmly into the joints, ensuring it fills them completely. Remove any excess grout using a damp sponge.
Step 6: Seal the Tiles
To protect the tiles and grout from stains and moisture, apply a penetrating sealer. Use a brush or sponge to apply the sealer evenly over the entire surface. Allow the sealer to dry completely before using the countertops.
Step 7: Finishing Touches
Once the sealer has dried, you can add finishing touches to your tile countertops. Install any fixtures, such as a sink or faucet, and apply caulk around the edges to prevent moisture from seeping underneath. Your newly installed tile countertops are now ready to use and enjoy for years to come.

Installing Tile Countertops Backsplash Family Handyman

How To Install A Tile Counter Top Youtube

Installing A Tile Countertop Ibuildit Ca

Installing Tile Countertops Backsplash Family Handyman

Installing A Tile Countertop Ibuildit Ca

How To Install White Marble Epoxy Over Tile Kitchen Stone Coat Youtube

Tile Countertop Installation Disaster Elisa S Ramblings

Installing A Tile Countertop Ibuildit Ca

Installing Tile Countertops Backsplash Family Handyman

Ways To Enhance Your Kitchen Or Bath With Ceramic Tile Countertops
See Also


