How to Paint Kitchen Laminate Countertops
Laminate countertops, a common feature in many kitchens, are often chosen for their affordability and durability. However, their aesthetic appeal can fade over time, prompting homeowners to consider replacement. An alternative to the expense and disruption of countertop replacement is painting the existing laminate surface. This process, while requiring careful preparation and execution, offers a cost-effective way to refresh the kitchen's appearance and extend the life of the countertops.
Before embarking on this project, it's crucial to understand the scope of the undertaking. Painting laminate countertops is not a permanent solution and will likely require periodic touch-ups or reapplication, depending on the level of use and care. The finished result, while visually improved, will not possess the same durability and resilience as a professionally installed stone or solid surface countertop.
The success of a painted laminate countertop depends largely on meticulous surface preparation and the selection of appropriate paints and sealers. Rushing this process can lead to peeling, chipping, and an overall unsatisfactory finish. The following detailed steps outline the process for successfully painting kitchen laminate countertops.
Surface Preparation: The Foundation for Success
The initial stage of painting laminate countertops is arguably the most important. Proper surface preparation ensures adequate adhesion of the primer and paint, preventing premature failure of the finish. This stage involves thorough cleaning, sanding, and priming.
Begin by thoroughly cleaning the laminate surface. Use a degreasing cleaner designed to remove grease, grime, and food residue. Kitchen countertops are prone to accumulating these substances, which can interfere with paint adhesion. Wipe the surface with a clean, damp cloth to remove any cleaner residue. Allow the surface to dry completely before proceeding.
Once the countertop is clean and dry, the next step is sanding. Sanding creates a textured surface, providing "tooth" for the primer to grip onto. Use a medium-grit sandpaper, such as 120-grit or 150-grit, for the initial sanding. Lightly sand the entire surface of the countertop, focusing on areas that are particularly smooth or glossy. The goal is not to remove the laminate itself, but rather to dull the surface and create a slightly rough texture. Avoid excessive pressure, which can damage the laminate.
After the initial sanding, use a finer-grit sandpaper, such as 220-grit, to smooth out any scratches created by the medium-grit sandpaper. This step helps to create a more even and visually appealing finish. Again, use light pressure and focus on achieving a uniform texture across the entire surface.
Following sanding, it's essential to remove all sanding dust. Use a vacuum cleaner with a brush attachment to thoroughly remove dust from the surface. After vacuuming, wipe the countertop with a tack cloth. A tack cloth is a slightly sticky cloth specifically designed to pick up fine dust particles that vacuuming may miss. This ensures that the surface is completely clean and free of debris before priming. Consider using a damp cloth followed by a dry cloth to ensure zero dust presence.
The final step in surface preparation is priming. Apply a high-quality bonding primer specifically formulated for use on laminate surfaces. These primers are designed to adhere to slick, non-porous materials, providing a strong base for the paint to adhere to. Apply the primer in thin, even coats using a brush or roller, following the manufacturer's instructions regarding drying time. Multiple thin coats are preferable to a single thick coat, as they reduce the risk of drips and uneven coverage. Allow the primer to dry completely before proceeding to the painting stage.
Mask off any areas that should not be painted, such as the backsplash, sink, or surrounding cabinets, using painter's tape. Ensure that the tape is securely adhered to the surface to prevent paint bleed-through. Pay close attention to corners and edges, as these are particularly susceptible to paint seepage.
Selecting the Right Paint and Sealer
Choosing the appropriate paint and sealer is critical for achieving a durable and aesthetically pleasing finish on laminate countertops. Not all paints are created equal, and selecting the wrong type can lead to peeling, chipping, and a lackluster appearance. Similarly, the sealer protects the painted surface from moisture, stains, and wear, so choosing the right one is crucial for longevity.
For painting laminate countertops, epoxy-based paints or specialized countertop painting kits are generally recommended. Epoxy paint forms a very hard, durable coating that is resistant to scratches, stains, and heat. It is designed to withstand the rigors of daily kitchen use. Countertop painting kits often contain all the necessary components, including primer, paint, and sealer, specifically formulated for laminate surfaces. These kits can simplify the selection process and ensure compatibility between the different products.
Acrylic latex paint is another option, but it requires careful selection and application. Choose a high-quality acrylic latex paint with a durable, scrubbable finish. Latex paints are generally easier to work with than epoxy paints, but they may not be as durable or resistant to wear and tear. If using latex paint, consider applying several coats of a high-quality polyurethane sealer to provide added protection.
When selecting a sealer, prioritize water-based polyurethane sealers. These sealers are durable, non-yellowing, and easy to apply. They provide a protective layer that resists moisture, stains, and scratches, extending the life of the painted countertop. Choose a sealer with a matte or satin finish to avoid an overly glossy appearance. Applying multiple thin coats of sealer is preferable to a single thick coat, as it reduces the risk of drips and uneven coverage. Allow each coat of sealer to dry completely before applying the next.
Consider the color and finish of the paint carefully. Light colors tend to show stains and scratches more easily than darker colors. Matte or satin finishes are generally more forgiving than glossy finishes, as they tend to hide imperfections and scratches better.
Application Techniques and Finishing Touches
The application of the paint and sealer requires patience and attention to detail. Proper application techniques are essential for achieving a smooth, even, and durable finish. Neglecting these techniques may result in an uneven finish, visible brush strokes, or premature failure of the paint.
Begin by applying the first coat of paint in thin, even strokes. Use a high-quality brush or roller designed for use with the chosen paint. Avoid applying too much pressure, which can lead to drips and uneven coverage. Work in small sections, overlapping each stroke slightly to ensure complete coverage. Allow the first coat of paint to dry completely, following the manufacturer's instructions regarding drying time.
Once the first coat of paint is dry, lightly sand the surface with a fine-grit sandpaper, such as 320-grit or 400-grit. This step helps to smooth out any imperfections and create a more even surface for the second coat of paint. Remove all sanding dust with a tack cloth before proceeding.
Apply the second coat of paint in the same manner as the first, using thin, even strokes and overlapping each stroke slightly. Allow the second coat of paint to dry completely before proceeding. Depending on the color and coverage of the paint, a third coat may be necessary to achieve a uniform and opaque finish. If a third coat is needed, repeat the sanding and cleaning process before applying it.
After the final coat of paint is dry, apply the sealer according to the manufacturer's instructions. Use a new, clean brush or roller to apply the sealer in thin, even coats. Avoid applying too much pressure, which can lead to drips and uneven coverage. Allow each coat of sealer to dry completely before applying the next. Apply at least two to three coats of sealer for optimal protection. Lightly sand between coats of sealer with a fine-grit sandpaper to smooth out any imperfections.
Once the final coat of sealer is dry, carefully remove the painter's tape, pulling it away from the painted surface at a 45-degree angle. This helps to prevent the paint from chipping or peeling. Inspect the finished countertop for any imperfections, such as drips, runs, or uneven coverage. Touch up any imperfections with a small brush and the appropriate paint or sealer.
Allow the painted countertop to cure for the recommended time before using it. Curing allows the paint and sealer to fully harden and reach their maximum durability. Avoid placing heavy objects on the countertop during the curing period. Follow the manufacturer's instructions regarding cleaning and maintenance. Use mild, non-abrasive cleaners to clean the countertop, and avoid using harsh chemicals or scouring pads. Wipe up spills promptly to prevent staining.
By following these steps carefully and paying attention to detail, it is possible to achieve a professional-looking painted finish on laminate countertops, extending their lifespan and revitalizing the kitchen's aesthetic.

I Painted My Kitchen Countertops Ugly Duckling House

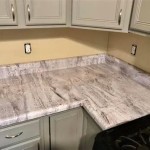
How To Paint Laminate Countertops Look Like Granite

How To Paint Laminate Countertops 4 Easy Actions

Easy How To Resurface Laminate Countertops For Under 50

How To Paint Laminate Countertops Look Like Marble

Update Laminate Countertops With Paint Using Rustoleum Countertop Transformations Blue I Style

How To Paint Laminate Countertops Step By Supply List Plus 1 Year Real Life Review Youtube

How To Paint Laminate Kitchen Countertops Diy Network Youtube

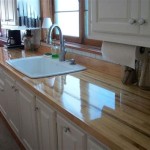
Diy Painted Laminate Countertops Plus An Update

Glossy Painted Kitchen Counter Top Tutorial Remodelaholic
See Also