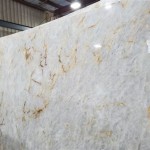
How to Redo Bathroom Countertops
Bathroom countertops are a focal point in any bathroom, and over time, they can become scratched, stained, or simply outdated. If you're looking to refresh your bathroom without a full-scale renovation, redoing your countertops is a great option. While it may seem daunting, with the right planning and execution, you can give your bathroom a new lease on life.
1. Choosing the Right Material
The first step is to choose the right material for your new countertops. Consider your budget, style preferences, and the overall design of your bathroom. Here are some popular options:
- Laminate: Affordable, durable, and available in numerous colors and patterns.
- Quartz: Non-porous, resistant to scratches and stains, and comes in a wide variety of colors and patterns.
- Granite: Natural stone with unique veining patterns, durable and heat-resistant. Requires sealing to prevent staining.
- Marble: Elegant and luxurious, but susceptible to scratches and etching. Requires regular sealing.
- Solid surface: Non-porous, seamless, and available in various colors. Easy to maintain and repair.
Research the pros and cons of each material thoroughly and consider the following factors:
- Durability: How resistant the material is to scratches, stains, and heat.
- Maintenance: How often does the material need to be cleaned and sealed.
- Cost: The price of the material, installation, and any additional costs.
- Style: How well the material fits with the overall design of your bathroom.
2. Preparing the Countertop
Once you've chosen your material, prepare your existing countertop for the new surface. This involves removing the old countertop, if applicable, and ensuring the base is level and smooth.
Here's a step-by-step guide:
- Clear the countertop: Remove all items and fixtures from the countertop, such as sinks, faucets, and mirrors.
- Remove the old countertop: If your countertop is laminate or another thin material, you can usually pry it off with a pry bar. If it's a thicker material such as granite or marble, you may need to hire a professional for removal.
- Clean the base: Thoroughly clean the base of the countertop using a degreaser and a scrub brush. Remove any debris, dirt, or old adhesive.
- Level the base: Use a level to check if the base is level. If not, use wood shims or a leveling compound to achieve a level surface.
- Seal the base: Seal the base of the countertop with a sealant or primer to prevent moisture damage and ensure proper adhesion of the new countertop material.
3. Installation and Finishing
The installation process varies depending on the chosen material. Here's a general overview:
Laminate: Laminate countertops are typically installed using a sheet of plywood or particle board as a base. The laminate is then glued and clamped onto the base, and the seams are sealed.
Quartz, Granite, and Marble: These natural stone countertops are usually prefabricated and installed by a professional. They are typically secured using a specialized adhesive and may require additional support using brackets or clips.
Solid Surface: Solid surface countertops are often custom fabricated and installed by a professional. They can be cut and shaped to fit the existing countertop base and are typically secured with a specialized adhesive.
After the countertop is installed, you will need to install any fixtures, such as sinks and faucets. You may also need to caulk the edges of the countertop to prevent water damage.
4. Maintenance and Care
Once your new countertops are installed, proper maintenance is essential to keep them looking their best.
- Clean regularly: Use a mild soap and water to clean your countertops. Avoid abrasive cleaners that can scratch the surface.
- Seal regularly: Stone countertops, such as granite and marble, require periodic sealing to prevent staining.
- Avoid heat damage: Use trivets or pot holders to protect your countertops from hot items.
- Address scratches or stains promptly: If you notice scratches or stains on your countertops, address them immediately to prevent further damage.
Redesigning your bathroom countertops is a rewarding project that can dramatically improve the look and feel of your bathroom. By carefully selecting your material, preparing the countertop adequately, and taking care of your new surface, you can enjoy a fresh, functional, and stylish bathroom for years to come.

Paint Bathroom Vanity Countertop Sink So Easy A Piece Of Rainbow

How To Refinish Bathroom Countertops Domestic Blonde

How To Easily Spray Paint Bathroom Countertops My Homier Home
:strip_icc()/101922779-2cbc45e123c34827afb4f601723b03ca.jpg?strip=all)
How To Paint Bathroom Countertops

Paint Bathroom Vanity Countertop Sink So Easy A Piece Of Rainbow

How To Refinish Laminate Counters Made By Marzipan

Paint Bathroom Vanity Countertop Sink So Easy A Piece Of Rainbow

How To Easily Spray Paint Bathroom Countertops My Homier Home

How To Paint Tile Countertops And Our Modern Bathroom Reveal Bright Green Door

Before And After Bathroom Vanity Transformation With Painted Tile Countertop The Minimal Ish Mama
See Also


