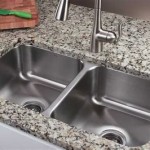
How To Repair A Cracked Countertop
Countertops can crack for a variety of reasons, including impact damage, thermal stress, or improper installation. While a cracked countertop is not necessarily a major structural issue, it can be unsightly and may allow bacteria to grow. Fortunately, repairing a cracked countertop is a relatively simple process that can be completed in a few hours with the right tools and materials.
Materials Needed:
- Epoxy repair kit
- Sandpaper (120-grit and 220-grit)
- Putty knife
- Mixing cups and sticks
- Masking tape (optional)
- Acetone or rubbing alcohol
- Clean cloths
Steps:
1. Clean the Crack: Start by cleaning the crack and surrounding area with acetone or rubbing alcohol. This will remove any dirt or debris that could interfere with the repair.
2. Widen the Crack (Optional): If the crack is very narrow, you may need to widen it slightly to ensure that the epoxy can penetrate deeply. Use a utility knife or a sharp chisel to carefully widen the crack to about 1/16 inch.
3. Mix the Epoxy: Follow the instructions on the epoxy repair kit to mix the epoxy. Typically, this involves combining equal parts of resin and hardener and mixing thoroughly until a uniform color is achieved.
4. Apply the Epoxy: Use a putty knife to apply the epoxy to the crack. Press the epoxy into the crack, making sure to fill it completely. If the crack is deep, you may need to apply multiple layers of epoxy.
5. Level the Epoxy: Once the epoxy has been applied, use the putty knife to level it with the surrounding countertop. If desired, you can use masking tape to create a temporary dam around the crack to prevent the epoxy from spreading.
6. Allow the Epoxy to Cure: Allow the epoxy to cure according to the manufacturer's instructions. This typically takes several hours or overnight.
7. Sand the Repaired Area: Once the epoxy has cured, sand the repaired area with 120-grit sandpaper to remove any excess epoxy and smooth the surface. Then, switch to 220-grit sandpaper to finish the surface.
8. Clean the Countertop: Wipe down the repaired area with a clean cloth to remove any sanding dust. Your countertop is now repaired and ready to use.
Tips:
- Use a sharp utility knife or chisel to widen the crack. A dull blade can create jagged edges that will make the repair more difficult.
- Mix the epoxy thoroughly before applying it. Improperly mixed epoxy will not cure properly and may fail.
- Apply the epoxy in thin layers. This will help to prevent the epoxy from cracking as it cures.
- Allow the epoxy to cure completely before sanding it. Sanding the epoxy too soon can damage the repair.
- If the crack is large or deep, you may need to consult with a professional for repair.
:max_bytes(150000):strip_icc()/before-after-56a4a2d25f9b58b7d0d7eff8.jpg?strip=all)
How To Repair A Cracked Solid Surface Countertop

Epoxy Stone Repair Granite Countertop Artistic

How To Fix A Crack In Your Counter Top

Cracks Repaired And Granite Refinished San Diego Ca
How To Repair A Crack In Corian Countertop The Washington Post

Granite Crack Repair In Front Of Sink Complete Process 15 Minutes Youtube

Cracked Marble Countertop Repaired Lafayette Ca

Broken Granite Countertop Before After Being Repaired

Repair Crack In Granite Counter Top Doityourself Com Community Forums
How To Fix Cracked Marble The Washington Post
See Also


