How To Reseal Quartzite Countertops
Quartzite countertops are a popular choice for homeowners seeking a durable and aesthetically pleasing surface. Known for its natural beauty and resistance to heat and etching, quartzite offers an excellent alternative to granite or marble. However, while quartzite is quite durable, it is not entirely impervious to staining and moisture penetration. Regular sealing is crucial to maintain its integrity and appearance over time. This article outlines the necessary steps and considerations for effectively resealing quartzite countertops, ensuring their longevity and beauty.
Understanding Quartzite and Its Porosity
Quartzite is a metamorphic rock formed from sandstone and quartz under intense heat and pressure. This process creates a durable stone with varying degrees of porosity. The porosity of a particular slab is paramount in determining the frequency of sealing required. Some quartzite varieties are denser and less porous than others, requiring less frequent resealing. Others, with more open structures, need more regular attention.
It is important to distinguish quartzite from quartz, a manufactured product often marketed under brand names like Silestone or Caesarstone. Quartz countertops are engineered stone, composed primarily of quartz crystals bound together with resins and polymers. These engineered surfaces are non-porous and do not require sealing. Understanding this distinction is critical, as applying sealant to a quartz countertop is unnecessary and can even damage the surface.
A simple water test can help determine the porosity of your quartzite countertop. Place a few drops of water on the surface and observe how quickly the water is absorbed. If the water beads up and remains on the surface for several minutes, the stone is likely adequately sealed. If the water is absorbed quickly, it indicates that the sealant has worn off and resealing is necessary.
Preparing for the Resealing Process
Proper preparation is essential for a successful resealing project. This involves thoroughly cleaning the countertop, allowing it to dry completely, and gathering the necessary materials. Rushing the preparation stage can lead to uneven sealant application and compromise the long-term effectiveness of the resealing effort.
The first step is to remove all items from the countertop, including appliances, utensils, and decorative objects. This ensures unobstructed access to the entire surface. Next, the countertop must be thoroughly cleaned. Use a pH-neutral cleaner specifically designed for natural stone. Avoid using abrasive cleaners, bleach, or acidic substances like vinegar or lemon juice, as these can damage the stone's surface. Wipe down the countertop with the cleaner and a soft cloth or sponge, removing all dirt, grease, and spills.
Once the countertop is clean, rinse it thoroughly with clean water to remove any cleaner residue. It is crucial to dry the countertop completely before applying the sealant. Any remaining moisture can interfere with the sealant's ability to penetrate the stone and create a proper bond. Allow the countertop to air dry for at least 24 hours, or use a clean, dry cloth to expedite the drying process. A dehumidifier can also be utilized to accelerate drying, especially in humid environments.
Gather all the necessary materials before starting the resealing process. This includes a high-quality stone sealant specifically formulated for quartzite, a clean lint-free cloth or applicator pad, and disposable gloves. The appropriate sealant is crucial for optimal protection. Ensure the sealant is compatible with quartzite and provides both stain and water resistance. Reading the sealant's instructions thoroughly is essential before commencing the application.
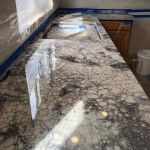
Consider masking off the surrounding areas, such as the backsplash, cabinets, and adjacent walls, with painter's tape. This will protect these surfaces from accidental sealant application. Adequate ventilation is also important. Open windows and doors to provide fresh air circulation, or use a fan to ensure proper ventilation, especially when working with solvent-based sealants.
Applying the Sealant
The application of the sealant requires care and attention to detail. Following the manufacturer's instructions precisely is essential for achieving optimal results. Apply the sealant in thin, even coats, avoiding excessive amounts that can pool and create a sticky residue.
Put on disposable gloves to protect your hands from the sealant. Pour a small amount of sealant onto the clean lint-free cloth or applicator pad. Begin applying the sealant to the countertop in a consistent, overlapping pattern. Work in small sections, ensuring that the entire surface is evenly coated. Avoid applying the sealant in direct sunlight, as this can cause it to dry too quickly and prevent proper penetration.
Pay particular attention to areas around the sink, faucet, and seams, as these are often more vulnerable to moisture penetration. Apply a slightly heavier coat of sealant in these areas to provide extra protection. However, avoid over-saturating the stone, as this can lead to a cloudy or streaky appearance. The goal is to saturate the pores of the stone without leaving excess sealant on the surface.
Allow the sealant to dwell on the surface for the time specified by the manufacturer. This dwell time allows the sealant to penetrate the stone and form a protective barrier. After the dwell time, use a clean, dry lint-free cloth to wipe away any excess sealant from the surface. Wiping away the excess is crucial to prevent the sealant from drying on the surface and creating a sticky or hazy finish. Use a gentle, circular motion to remove the excess sealant, ensuring that the entire surface is clean and dry.
Some sealants require multiple coats for optimal protection. If the manufacturer recommends multiple coats, allow the first coat to dry completely before applying the second coat. Follow the same application procedure as with the first coat, ensuring that each coat is applied thinly and evenly. After applying the final coat and removing any excess sealant, allow the countertop to cure completely. The curing time can vary depending on the type of sealant used, but it typically takes 24 to 72 hours. Avoid using the countertop during the curing period to allow the sealant to fully harden and bond to the stone.
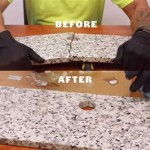
After the sealant has fully cured, test the countertop by placing a few drops of water on the surface. If the water beads up and remains on the surface, the resealing process was successful. If the water is absorbed quickly, it may be necessary to apply an additional coat of sealant. Regularly inspect the countertop for signs of staining or water absorption, and reseal as needed to maintain its protection and appearance.
Proper maintenance after resealing is crucial to prolong the life of the sealant. Clean spills promptly with a pH-neutral cleaner and a soft cloth. Avoid using abrasive cleaners or harsh chemicals, as these can damage the sealant and the stone. Use cutting boards when preparing food to prevent scratches and stains. Use trivets and hot pads under hot pots and pans to protect the countertop from heat damage. By following these simple maintenance tips, you can keep your quartzite countertops looking beautiful for years to come.

The Ultimate Guide To Sealing Quartzite Worktops Stonegate Knowledge Hub

The Best Sealer For Quartzite Countertops Evolution Of Style

How To Seal Quartzite Countertops A Step By Guide

The Best Sealer For Quartzite Countertops Evolution Of Style

Stripping And Sealing A Quartzite Countertop White Macauba

Sealing Quartzite Made Easy Imperial Stone Group

How To Seal Quartzite Countertops Opple House

The Best Sealer For Quartzite Countertops Evolution Of Style

How Seal Quartzite Countertops Step By Guide For Lasting

How To Treat Seal Granite Marble Countertops Lesher
See Also